Glass cutting isn't as hard as it might seem, as long as you have the right instructions. Nobody is perfect with glass, but you can get it right nearly every time. Here's how to cut 1/8" (3.1 mm) clear glass, also known as "double strength" (DS), which is probably the easiest to cut, as well as the most common.
Steps
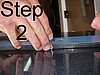
Clean the surface, but only along where you plan to score. Any grime or silica (the substance that makes two pieces of glass slide on top of each other to prevent scratching) will ruin your score and make you think you cannot cut properly. Just run your finger along the surface of the glass where you plan to score.
Obtain a glass cutter.
Grasp your cutter like a pencil. Make sure to look at the wheel and its orientation to the glass and align it properly. This is a very simple grasp to achieve, so do not unduly complicate it.
Use a scrap piece of glass to practice on. Apply pressure to the glass as you pull the cutter along the surface, rolling on the small carbide wheel. Listen for the clicking or gritty sound of the wheel permeating the smooth surface of the glass. The less sound you make, the better your score will be. If you push too hard (a very common mistake), your cut gets "hot", meaning that it snaps and pops. Try it and you'll see. You are aiming to get a uniform score. If you are pressing too hard in one spot and perfectly in another, the glass will not break how the way that you want it to. Microscopic imperfections in your score will cause your cut to go askew.
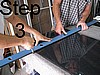
Score along a straight edge. Use a yardstick (meter ruler) or a normal desk ruler. Use something that has a high enough profile so that it won't conflict with the wheel on the cutter, such as a ruler with a thin metal edge.
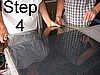
Practice on scrap glass until you're ready for the real thing. You'll have a score that is not popping and is barely visible if you were to wipe the oil away. It should look like a small scratch, that's all, nothing more.
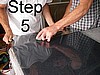
Grasp each side of the cut as if you were trying to break a potato chip in half with two hands. All it takes is minor pressure. It is all in the wrist action. Your elbows do not move. Simply twist your wrists (your right wrist will turn clockwise and your left will turn counterclockwise). Imagine that the score you made is half the depth of the glass and now you need to "open it up" by using the score as a weak spot.
Note: It may simply start as a "run." A run is where the glass is starting to break along your score. It may also run the entire length of your score. Either is fine. If it only runs an inch (2.5 cm) or so, apply a little more twisting pressure and it will continue to run. You're done as soon as you have two pieces of glass instead of the one you started with.
Use fine sandpaper or even better, a sharpening stone, to remove the sharp edge. This edge will be where the vertical edge meets the horizontal surfaces. Not only does sanding reduce the chances of your being cut but sanded glass is less likely to chip along the edges and has some added strength.
Tips
If you have cut drywall, tile, wood shims, acrylic, or plexiglass, remember that they all follow the same theory. Make a weak spot, or an imperfection, along your surface and break it along the weakened line. Simple, right?
You can generally find a glass shop that will part with scraps for next to nothing, if not for nothing.
You are limited only by your creativity and ingenuity. If you can't get creative, plan to make only square cuts. Otherwise, you can create any shape possible, from mirror and different types of obscure and translucent glasses. Don't think of things you've seen before. Imagine that you are the first person to ever cut glass. Ask yourself, "What do I want to make today?" Straight lines are unimaginative.
To cut a line that is not straight, use steps 4 and 5 and follow any freehand shape or something you may draw on the glass with a felt marker. Once you've scored, flip the glass over and gently press on the center of your score from the backside. You will start a run this way. Follow the run with light pressure and you can watch the glass separate where you scored it. If your score is too close to the edge of a piece of glass, it will run to the edge instead of along your score because that is the easiest path for the run to take. Make some relief cuts to remove small pieces at a time instead of all at once. The smaller the relief cuts, the more accurate your cut will be. Practice makes perfect.
Warnings
If you apply a decent amount of pressure and nothing happens, stop. You are going to cut yourself. Imagine the piece of glass you are cutting has no score; would you apply heavy twisting pressure with your bare hands to a piece of glass? No. If it does not happen easily, it is not going to happen. Relax and be gentle with it.
Edges are sharp and will cut you badly; respect glass or it will hurt you. Stitches are not unlikely, and they are common among learning cutters.
Wear gloves. Edges and points are very sharp. So wear a heavy cloth glove or leather. But it should fit snugly so you don't lose your dexterity.
Wear goggles. If the glass cracks irregularly a piece could shoot off and hit in your eye.
Be sure and clean your work area throughly to clean up any bits of glass you might have created. Even if you can't see them, they can get lodged in your feet or hands and hurt.
Never consume or leave food or drink in areas where you're working with glass.
If you do not achieve a proper scoring of the glass, do not go back over it with the glass cutter as it will damage the cutting wheel and likely not solve your problems. Practicing with scrap glass is very practical as a bad scoring that has gaps, uneven spots etc. is not easily corrected and likely means you've ruined the glass.